Dusting off the Array! (Part 5)

OK, new plan! After several reboots the array resyncs with about 120 MB/s, but it stops with “recovery interrupted” at about 40%. I have no idea how to fix this, so I’m gonna rebuild the array from scratch.

I ordered 3 new HGST 4 TB drives, hopefully delivered by tomorrow (2017/08/09). The Plan:

  1. Build a striped LVM device over 2 new drives. That should be enough to save all data.
  2. Rsync everything to the LVM device
  3. Replace the failing Seagate drive and rebuild the Array from scratch
  4. Rsync the data back to the RAID array and maybe replace the last remaining Seagate drive


Dusting off the Array! (Part 4)

Well, well, here we are again! Another fight with the rotating drives. If 2TB SSD’s weren’t so expensive (2017/07/30 => ~550 €), I would have replaced all of them by now!

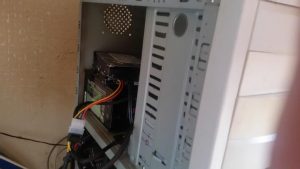
Yesterday (2017/07/29) the oldest drive failed hard, no way to get it working, so I replaced it with a 4GB HGST drive. Should be easy, right? But it isn’t. Had to rip the intestines out:

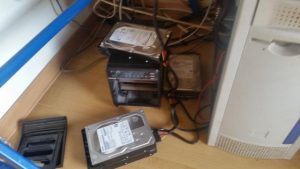
Had to connect all drives to the internal SATA-Connectors so the board would recognize them. In the external casing it was come and go 🙁

After disabling NCQ by adding libata.force=noncq to the kernel command line I got up to whopping 6000K/sec resync speed! It’s not the kernel. Tried 4.9, 4.11 and 4.12, all the same. The problem is this drive, because it’s failing, too, I guess:

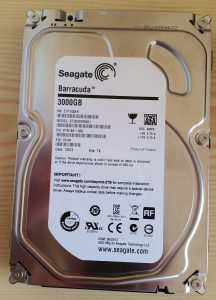
Model Family:     Seagate Barracuda 7200.14 (AF)                                                                     
Device Model:     ST3000DM001-1CH166 
Serial Number:    Z1F58T6T 
LU WWN Device Id: 5 000c50 06725c7df 
Firmware Version: CC27 
User Capacity:    3,000,592,982,016 bytes [3.00 TB] 
Sector Sizes:     512 bytes logical, 4096 bytes physical 
Rotation Rate:    7200 rpm 
Form Factor:      3.5 inches 
Device is:        In smartctl database [for details use: -P show] 
ATA Version is:   ACS-2, ACS-3 T13/2161-D revision 3b 
SATA Version is:  SATA 3.1, 6.0 Gb/s (current: 6.0 Gb/s) 
Local Time is:    Mon Jul 31 01:05:03 2017 CEST 
SMART support is: Available - device has SMART capability. 
SMART support is: Enabled

Of course hadante crashed hard once already, but I do hope that the resync will be done once I’m back from Wacken. About 5 days (7500 minutes) remaining without crash.

Tried to update the drive’s firmware, but that was quite a hassle, too. Had to use chntpwd on othalla to log in and make a bootable USB drive with the latest SeaTools. All for nothing, though 🙁

BIOS Update

Since installing my new Ryzen System, hadante is acting up a little. Spontaneous reboots or crashes, things like that. During my latest debugging session I thought that maybe a BIOS/UEFI update would help. Sure enough ASUS provided one for my superduper PRIME X370-PRO board. Changelog: “Improve system stability”. Wow, any more information and my brain would explode! Anyway, worth a try…

This UEFI-Crap-Thingy said that it could connect to the Internet via DHCP. Since Vodafone does DHCP it shouldn’t be a problem, right? WRONG! After freezing for a minute or two it says that there’s no network connectivity. Silly me, what did I expect?

OK, there’s an option for USB-devices. FAT32 with a single partition only, but fortunately I have such a beast. So download the new BIOS, copy it to the USB-stick, reboot and… Nothing! Nothing but a black screen after pressing F2 and/or DEL. Cold sweat, Shit! Did I just brick my board? No, after unplugging the USB-stick I can enter the BIOS again, and it even boots. Phew!

But I’m adventurous. New idea: The board only has USB3.0 slots, so let’s try an USB3-stick. So reboot, mount everything, copy the BIOS image to the USB3-stick, reboot, and cross fingers.

Lo and behold: The BIOS has landed! I can select the USB-Stick from the EZ-Update-Tool and see the image file. It gets even better: The UEFI-Crap installs it without complaints!

All settings are reset to default, but I didn’t change much. Just turn on SVM again, fix the boot order and set all SATA ports except the SSD’s to hotplug. Exit and reset, crossing fingers and… PXE boot. WTF? Another hard reset later we have GRUB!

Let’s hope the update keeps its promises!

[UPDATE 2017/06/18 4:40AM]: Well, it doesn’t 🙁 I was working with libreoffice when suddenly the system lost power. It just turned off, like pressing the power button. The LED-thingy on the motherboard was still on, but nothing more. To turn it on again, I had to flip the switch on the PSU first. Just pushing the ACPI-Power-Button wouldn’t revive the system. Fortunately the RAID survived it. Has to be some BIOS setting. Can’t be the temperature, though. Voltage, maybe?

Ryzen

After Lausitzring

I ordered a new motherboard, an AMD Ryzen 6-Core CUP with 16 GB DDR-4 RAM and a Macho Rev. 2b Cooler on Thursday, May 18th 2017. Paid by cash in advance, because mindfactory didn’t offer payment by credit card. Anyway, a colleague of mine ordered a gaming computer there before, so prepayment was no problem. The shipment arrived on Saturday, the 20th, when I was at the Lausitzring. Because we left early, I got the package from my neighbor Sunday evening.

Unpacking

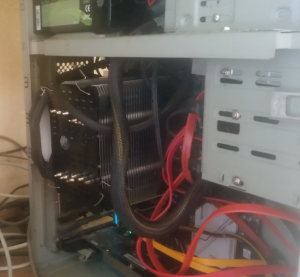
Craptastic. The biggest box in the parcel was the Macho CPU-Cooler! It’s so big that I can’t even close the lid on my casing. Was quite a challenge to assemble. It looks like this:

The heat sink is the big thing in the middle, the turning fan is the white thing to the leftmost. My bedside cabinet was easier to put together!

With the ASUS-AM4-Board you don’t have to remove the backplate. Actually, you can’t. The spacers fit into the threads if you remove the brackets (barely). The heat sink still slides when you fasten the screws, but fortunately it doesn’t really matter.

I benchmarked the whole thing by re-encoding several videos from 1080p to 720p with ffmpeg, threaded. The temp didn’t raise over 65 °C, and it’s blazing fast. My old 6 core did it in real time, now it’s about half the time. At least ffmpeg says so…

Loudness

At first I thought it would be a problem that I couldn’t close the lid, but it isn’t. Actually, the external RAID with 4 hard discs is louder than the CPU fan on full speed. Good thing I orderd the separate cooler. I thought they’d deliver the CPU boxed, with one, but as it turns out, they didn’t.

First Boot

Well, after stuffing everything into the small casing, I pushed the power button and… Nothing! Fortunately I quickly remembered that I forgot to connect the whole Shebang, HDD-Led, power button, speaker and such to the panel. So, disconnect everything (VGA, USB, Network), get it out from under the table and fix it. Next try: One short beep, three long ones, no picture on either display. Shit!

The manual says that it means a missing graphics card. There definitely is one, but maybe in the wrong slot. I now have 3 PCI-Express slots. The first one isn’t usable, because it’s covered by the giant heat sink. So I get under the table and place the NVIDIA-Card into the downmost slot.

That did it! I’m greeted by an UEFI-BIOS and press DEL instantly. Not much to do in there, besides turning on SVM (Virtualization). I managed to get all 3 network cables right the first time, so I have network! The external SATA-casing is no problem, either, instantly recognized. Perfect!

htop shows 12 CPUs, 6 real cores, and 6 Hyperthreading. No fiddling around with UEFI-shit. Grub loads the kernel, as it shoud. Share and enjoy!

Dusting off the Array! (Part 3)

And the story continues… The spare drive I bought on 2016/06/27 was defective as well. As it turned out, it wasn’t even new! The Seagate Warranty Check said: “Out of Warranty” 🙁

Z1F142XH-2

I contacted Amazon and they immediately forwarded my request to the retailer (2016/09/03 4:44pm). Let’s what happens…

I ordered a new drive on 2016/08/27 6:50pm, this time a Hitachi 4TB drive (HGST 0S03665 4TB Deskstar), but I made a mistake: I chose a Packstation as delivery address, even though I don’t have an account (yet), so the parcel was returned to sender (Amazon). At first I couldn’t make sense of the delivery status: Amazon said that the parcel was successfully delivered, but DHL said that it had been returned to sender. A short phone call cleared things up: The drive was indeed returned and I received a credit note (2016/09/02 about 1:40pm).

Later that day I ordered another Hitachi 4TB drive with the same retailer which arrived early next day (2016/09/03 about 9:00am). Unfortunately there wasn’t much time to waste: I had to fail the spare drive hard, because it hung the SATA bus during rebuild:

# mdadm --manage /dev/md1 --fail /dev/sdi

At first I thought that munin -> smartctl -a caused the hangs, but disabling it didn’t help.

While replacing the failed drive I burnt my fingers from the heat, so I set the fan to maximum when I turned Hadante on again. Rebuild is 42% done, still 11 hours to go  as of 2016/09/03 5:25pm. No issues yet, keeping my fingers crossed 🙂

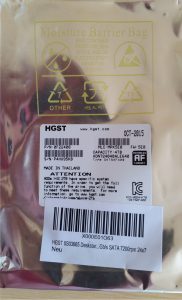
Anyway, this is a photo of the anti-static bag the Hitachi drive came in (SN: P4HU95KB):

P4HU95KB

(Update 2016/09/04 06:56AM): Yeah! The rebuild is done! Hopefully safe again! The obnam LV shut down due to xfs errors, but that’s something I can live with. Maybe it’s the aftermath for force-assembling the array…

Part 1
Part 2
Part 4

Dusting off the Array! (Part 2)

Craptastic^2! Another drive failed as of Thursday morning during backup (2016/08/25). The box hung hard, the SATA bus was completely b0rked, so the process list was filling up with defunct smartctl commands, driving the load towards 100…

OK, no problem, one hard reset later the array was rebuilding. So far, so good, but during the next backup the array failed again, which was kinda expected. In hindsight I should have disabled the job, though. Anyway, Friday morning the box was locked up hard again. Poweroff hung at unmounting the array, no progress at all, so I just turned it off.

Friday afternoon I replaced the failed disk, booted up and was in deep shit! mdadm told me that it cannot start a dirty degraded array. FUCK! There goes my data, I thought… But Google came to rescue!

Fortunately mdadm allows you to force-assemble a dirty, degraded array with:

# mdadm --assemble --force /dev/md1 /dev/sd[ghj] missing

Or so I thought. That command exited with an I/O-Error, because the drives were for busy for some reason.

# cat /sys/block/md1/md/array_state  
inactive

As turned out, inactive is kinda still active. You have to stop the array first to get it working again:

# mdadm -S /dev/md1

Only then it can be force-assembled with the aforementioned command. Once it’s up and running (degraded), add the new disk:

# mdadm --manage --add /dev/md1 /dev/sdi

Now it should be rebuilding. Cross your fingers and pray to whatever god you worship 🙂 Of course the array was shut down Saturday morning, because I still didn’t disable the backup job, but this time it shut down cleanly. One reboot later the rebuild continued…

I guess I was very, very, very lucky: As far as I can tell there was mostly read access up to the 2nd failure (backup). The file systems (all XFS) mounted after recovering from the transaction logs, and the data seems to be OK, but I’ll see…

Lessons learned

  • Always shut down the array cleanly at the first sign of trouble! Don’t wait until the drive fails completely!
  • Don’t think that the failing drive will recover during rebuild. It won’t! It’ll only make things worse.
  • SEAGATE Barracuda drives, esp. ST3000DM001, are, to put it mildly, crap! I didn’t keep track of the history, but I think I replaced each of them at least once. So I ordered a  HGST 0S03665 Deskstar NAS 4TB 6Gb/s SATA as replacement instead of the cheaper (and smaller) SEAGATE drive. Let’s see how that turns out…
  • An inactive array can still be busy, e.g. active and has to be stopped before you can force anything…
  • Keep an up-to-date list of drives, their serials and position in the external SATA casing, so you don’t have to guess which drive failed!

Update (2016/08/27 5:23pm): Fuck SEAGATE! Once again a supposedly new drive almost failed me! At 99.9% rebuild the array shut down and I had to reboot, due to:

Aug 27 16:43:50 hadante kernel: ata5.02: exception Emask 0x100 SAct 0x7fffbfff SErr 0x0 action 0x6 frozen 
Aug 27 16:43:50 hadante kernel: ata5.02: failed command: WRITE FPDMA QUEUED 
Aug 27 16:43:50 hadante kernel: ata5.02: cmd 61/40:00:a0:9b:71/05:00:5c:01:00/40 tag 0 ncq 688128 out 
                                         res 40/00:ff:00:00:00/00:00:00:00:00/40 Emask 0x4 (timeout) 
Aug 27 16:43:50 hadante kernel: ata5.02: status: { DRDY }

After the reboot, the array rebuilt successfully, though. I’ll replace the failing (new) drive with the HITACHI when it arrives, and if that works, I’ll replace all drives, I think…

Part 1
Part 3
Part 4

Dusting off the Array!

Craptastic. Today (2016/06/26) another disc of my archive RAID5 failed (rotating,  SEAGATE ST3000DM001, Serial W1F245R4, out of warranty of course). When I opened the casing, I knew why. The drives were so hot (literally) that I almost burnt my fingers!

Note to Self: Vacuum the thing once in a while. I seriously doubt that any air was flowing at all! Let’s hope that it’ll survive the resync. Only 18 hours to go, Yay!

For the record: Hot-adding a disc to the array:

# mdadm --manage --add /dev/md[x] /dev/sd[y]

Update (2016/06/27 9:15am): I guess I almost lost the array. The rebuild was progressing fine at 93% (about 6:00am) when one of the drives started to make clicking sounds. At first I tried to sit it out, but eventually I shut down the computer and let the drives cool off. That was a very wise decision. 2 and a half hours later the rebuild is continuing with nominal speed and without clicking sounds.

Fortunately, the Linux kernel leaned to continue a RAID rebuild some time ago if it’s shut down cleanly, so it didn’t start from scratch.

Nevertheless, I ordered another spare drive. Seagate discs used to be much more reliable 🙁

Update (2016/06/27 9:50am): Had to shut it down again. One drive started acting up again. After a shower and a shave I fired it up again, this time with the front panel removed, so the air can circulate. Well, only 36 minutes to go, 98.1% done! Tomorrow 2 new drives will be delivered.

Update (2016/06/27 10:45am): Wow, this has to be a very bad joke, and a blessing in disguise. The rebuild didn’t finish, but fortunately the failed drive is the one I just replaced! The array is still there, so I’m crossing my fingers that the remaining discs survive until DHL rings my doorbell tomorrow!

Update (2016/06/29 10:30am): YES! The new drive is good, rebuild is done. Unfortunately failed new drive from the 27th is out of warranty 🙁 Who would have guessed…

Well, well, well… The story continues!

Part 2
Part 3

Telekom VDSL2 100/40

Bestellung und Auslieferung

Am 27.04.2016 habe ich via Internet Magenta Zuhause L bestellt (100/40 Mbit). Als Neukunde hat man sich geradezu rührend um mich gekümmert. Am 09.05.2016 wurde ich angerufen, um die Details der Installation abzuklären. War ganz gut so, denn aus den zahlreichen E-Mails habe ich nicht erkennen können, ob ein Techniker kommen muss oder nicht.

Es musste ein Techniker kommen. Das Zeitfenster war grandios: zwischen 8 und 16 Uhr. Allerdings hat er angerufen, bevor er losgefahren ist und angekündigt, dass er in 20 bis 30 Minuten vor Ort sei. So war es dann auch.

Als Erstes hat er ein Gerät an die TAE in der Wohnung angenöppelt, danach ging es in den Keller zum Hausanschluss. Dort hat er zwei Drähte rausgerupft und zwei andere aufgelegt. Wieder in der Wohnung hat der den Anschluss durchgemessen: 109Mbit/s Downstream. YEAH!

Das war Kundenservice par Exellence, muss ich sagen. Kann mich nicht beschweren!

Hartware

Da ich einen Router wollte, den man als Modem betreiben kann, habe ich den angebotenen Speedport-Trum nicht bestellt, da die Telekom den Modem-Modus aus der Firmware entfernt hat. Nach ein wenig F&E hat sich das Draytek Vigor 130 als Waffe der Wahl herausgestellt. Kostenpunkt: 103,92 € bei Amazon.

Laut Beschreibung vectoring-fähig, hat allerdings nur einen LAN-Anschluss. Egal, Karl. Hadante soll es routen 🙂

Voller Erwartung habe ich das Teil also angenöppelt und auf den Sync gewartet. Als er denn endlich da war, kam die große Enttäuschung: Lediglich 16Mbit/s, es sprach nur ADSL2+ 🙁 Also noch mehr F&E…

Dabei stellte sich heraus, dass ich eine spezielle Firmware benötige, damit das Teil VDSL spricht. Die bekommt man hier: Vigor130_v3.7.9_modem7.zip ist das Archiv der Wahl. Das ist die Version für G.Vectoring. Nach dem Firmware-Update hatte ich endlich die erwarteten 100/40 Mbit, Juchuu!

Modem-Betrieb

Um das Teil als Modem zu betreiben, muss man folgende Einstellungen vornehmen:

Internet Access -> General Setup
DSL Mode: Auto
VLAN Tag insertion (ADSL): Disable
VLAN Tag insertion (VDSL2): Enable
 Tag value: 7
 Priority: 0

PPPoE läuft auf VLAN 7, VLAN 8 ist IPTV, AFAIK. Abspeichern + Reboot des Modems. Dann:

Internet Access -> MPoA / Static or dynamic IP
MPoA (RFC1483/2684): Enable
Bridge Mode: "Enable Bridge Mode"

Abspeichern und obligatorischer Reboot des Modems. Danach darf man den “Roaring Penguin” bemühen.

Linux-Setup

Ich habe mir eine 1Gbit/s NIC von Intel gekauft: Die Intel EXPI9301CTBLK PRO1000 (Kernel Module e1000e). Die ist direkt mit dem Modem verbämselt. Wenn man den Benutzernamen unfallfrei zusammen klöppelt, ist der Rest ziemlich schmerzfrei. Der Benutzername lautet: <Anschlusskennung><Zugangsnummer>#0001@t-online.de. Die Daten stehen in den Einrichtungsunterlagen. Also:

# pppoe-setup

und die Daten eingeben. Danach

# pppoe-start

um zu testen, ob es funxioniert. Wenn ja, kann man den Service adsl aktivieren:

# pppoe-stop
# systemctl enable adsl
# systemctl start adsl

Um auch Pakete zu routen, muss die MTU für TCP komischerweise auf maximal 1382 festgetackert werden:

# iptables -t mangle -A POSTROUTING -o ppp0 -p tcp -m tcp \
--tcp-flags SYN,RST SYN -j TCPMSS --set-mss 1382

Habe erstmal fertig. Das Policy Routing ist leider schwieriger als gedacht, und IPv6 mit wechselnden Prefixen ist mehr oder weniger nutzlos 🙁
Hetzner – kVkm

How to get the vKVM console @Hetzner to work? It ain’t much of a surprise that it doesn’t work out of the box, because the advertised link directs you to a Java applet. That only displayed the header for me, on Linux and Windows 10. But fret not: there is a solution.

Fortunately, when vKVM is running, you can access it via SSH on Port 47772 with the given password. VNC should be listening on Port 47774, but it’s stunnled, so you can’t access it directly. QEMU-VNC is actually listening on Port 5901/tcp, so you have to tunnel you way in.

# ssh -L 5901:<remote_ip>:5901 -l root <remote_ip>

That should forward remote 5901/tcp to something you can access. Now run:

# vncviewer 127.0.0.1::5901

And no, the double colon is no typo! Now go, fix your problems and have fun!

IPv6 configuration Hetzner

(obsolete, superseded by https://tollana.d-tor.org/notes-to-self/?p=585)

Well, another issue I just noticed after the recent reboot of valhalla. When bridging, do never, ever use IPv6 autoconfiguration on the actual ethernet interface or the bridge itself. That will totally screw up the routing!

Disable it by adding the following lines somewhere in /etc/sysctl.d:

net.ipv6.conf.wan.use_tempaddr = 0 
net.ipv6.conf.wan.autoconf = 0 
net.ipv6.conf.br0.use_tempaddr = 0 
net.ipv6.conf.br0.autoconf = 0

You can change it directly by echoing the values to the respective proc files. Unfortunately, the changes only take effect after shutting down and taking the interface up again. So be really, really careful! Be warned: The interface won’t have an IPv6 address any more, so make sure that you have IPv4 connectivity!

You can do this with e.g. screen:

# screen
# ip link set down wan ; sleep 1; ip link set up wan